Projector Installation: Complete Step by Step Guide
Did you finally get a projector? You must have contemplated this decision a lot before sealing the deal. But, you made the right choice!
A projector provides you with an experience that a television cannot. With a wide screen, high resolution images, vibrant colors, HD sound and practically everything you could ask for in a home theater, a projector gives you a cinematic experience with every movie or show.
Do you want to waste this opportunity to live all your theater dreams by setting up the projector wrong? No, right?
Well setting up a projector is not as simple as a television setup because it has more intricate settings and requirements to ensure a rich, high quality experience.
Below is a step by step guide to for the best projector setup without an issue. These steps cover how to set up a projector and steps to using a projector. So, let’s dig in!

1. Choose your screen location and projector location
You probably already have a location in mind where you want to create your theater. Maybe, it is your basement or your lounge? Pick the perfect wall for your projector.
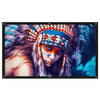
Make sure that too much direct light does not fall on it because that can fade the image display. Otherwise, purchase an ambient light rejecting screen to solve the problem.
Remember that getting a screen is optional. A projector works just as fine on a wall too.
Once you have your location picked, it is time to figure out where exactly the screen and projector will go.
2. Higher? Or lower?
It is important that your screen is high enough for all viewers to see clearly. The bottom of the screen should ideally be 24 to 36 inches above the ground.
You can go higher to adjust to your needs. The point is to align the centre of your lens just above the nearer edge of the screen.

3. Projector location
i. Throw Distance: distance between the projector and screen
The best way to decide is by testing your projector out. Make sure it is not too far away because that produces a very large image and not too close either because the image will be too small.
ii. Vertical Offset: How far above/below the screen
Once again, try things out practically. If your projector has an adjustable vertical offset you have nothing to worry about.
But if the vertical offset is fixed, then play around with it, trying different locations until you get it right. Once again, the centre of the lens should be just above the nearest edge of the screen.
4. Mount the projector
I. Leave it hanging!
If you want to mount your projector from the ceiling, buy a mount. Turn the projector upside down and hang it above the screen according to the position you had decided in the previous step. Later, do not forget to change the projector settings to turn the image upside down.
II. Set it down
Another choice is to place the projector on a nearby coffee table or surface in front of the screen. This may not be the best because there will always be the chance of accidentally bumping into the projector, changing its position.

5. Wire Up
Use HDMI cable to attach any gear you want to, with the projector. This may be your cable box or a gaming console. With everything in place, power the projector and get ready to see magic.

6. Project an alignment image
Use a downloaded image or a setup disc to check your screen display. This is a test pattern to ensure that your projector and screen location are correct.

7. Install Projector Sound System
Although modern projectors have a built-in sound system, it is not as good as you think. You need a good sound system to go with your cinema house. We recommend to set up an additional audio system with your projector. Pair your projector with our Goodee Soundbar.

8. Choose a Picture Mode
After setting up, you need to choose a picture mode. Picture modes are built-in and picking the right one is very important. The most ideal picture modes include the “Movie” and “Cinema” modes that are well suited to watching in a dark room.
However, if you have ambient light, go with something brighter. Do make sure that does not skew your screen green.
9. Optimize your picture quality
To further improve your experience, adjust various settings to make your picture quality better.
-
Brightness
Adjust brightness according to the level of light in your room but make sure it does not make your screen look too bleached or damp.
-
Resolution
720p to 1080p are ideal resolutions to have a vibrant, colorful image, which is not too pixilated either.
-
Zoom
Check the available options and look if you have a zoom option in your projector. This will be adjusted by turning a ring around the lens. It will help you to easily adjust the screen size without moving it. You can zoom in a little extra to ensure the whole screen is filled.
-
Focus
Another ring around the lens helps you adjust the focus of your image, just like in a camera. Slowly adjust it by rotating the ring, walk around and view the screen from varying distances and angles.

-
Roll
Make sure your screen and projector are aligned with the roll feature. Increase the height of your projector by placing something underneath to ensure it is level with the screen.
-
Pitch
Pitch is to ensure the image does not look tilted to one side. For this, lens and screen need to parallel to each other. Use support to keep the screen aligned.
-
Yaw
This adjustment is a bit trickier because you cannot use a level. It is to make sure the screen has no waves or dents and image is completely straight and smooth.
The centre of the image should be at the centre of the screen. Adjust the yaw along with the vertical shift and your image will become almost perfect!
Let’s Enjoy
While our guidelines cover almost everything, do go through the instructions manual with your projector. Projector installation and setup is complete. You now have all the answers to your home theater projector setup.
Now it's time to binge-watch your favorite seasons and movies, workout with the perfect tutorial in front of you, cook in the kitchen along with a recipe played on the screen or enjoy.


