Your Cart is Empty


Miyajima Goyomatsu: Grafted White Pine
Introduction
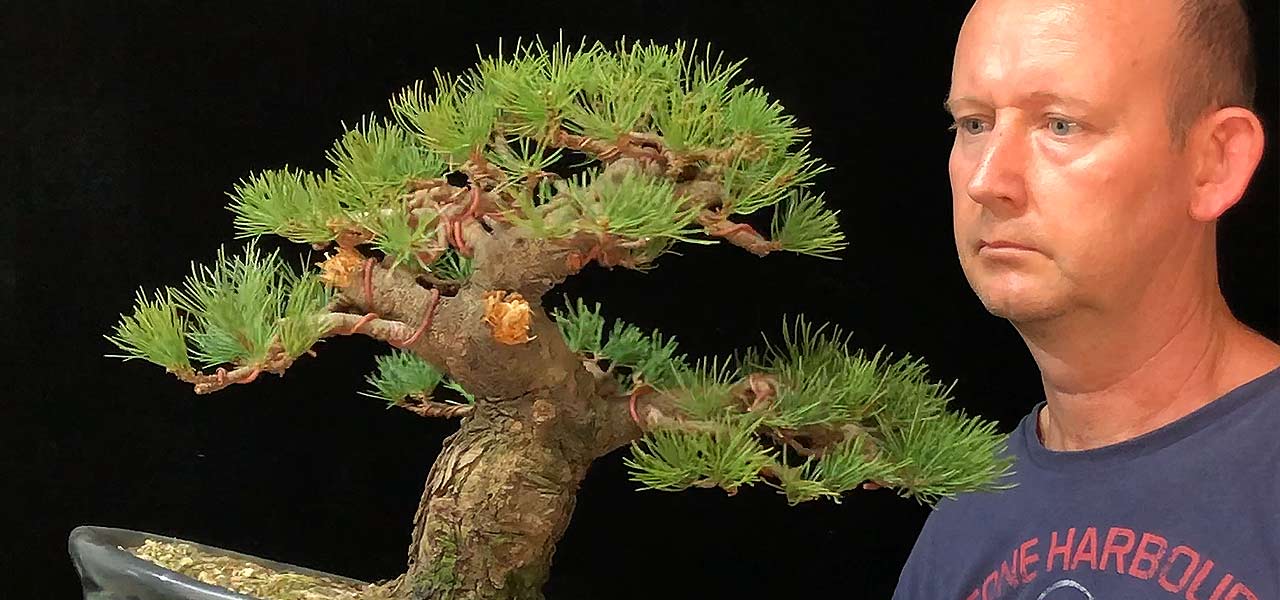
This tree was imported from Japan by Bonsai Tree in 2019. It had been bare rooted as part of the export procedure, so on arrival it was immediately potted into a good soil mix and allowed to recover and acclimatize itself to the local conditions and seasons.
After a season of just being watered, fed and basically allowed to laze in the sun, I carefully inspected the tree to see how the tree had responded. Based on my observations and confirming the health of the tree would permit it, I decided to style the tree.


It is this process which I would like now to share with you. The season in which this work was performed is also important to point out:
- I did this work during Autumn to take advantage of the thickening which takes place at this time of the year as trees prepare for overwintering.
- This would result in any wire which I would apply being highly effective as this growth would help to ensure the branches would remain in position after the wire is removed.
- It would afford me the opportunity of thinning old needles and to remove any dead inner branching to allow maximum light into the tree to strengthen and focus the tree's energy to the buds which remain.
- Sap flow is relatively low so the tree would bleed less from the cuts of any branches removed, much less than if this work was done for instance in spring or summer.

A bit of a giveaway regards the timing of the work is the colour of the older needles which die and begin falling from the tree.
Tree inspection
About
The Miyajima Goyomatsu or grafted Japanese White pine is an exceptionally strong grower which possesses many qualities attractive in a bonsai tree including the tendency to develop density very rapidly. The soft needles which develop in clusters of 5 (instead of 2 as is the case in two needle pines such as Japanese red and black pines) have a very interesting grey-green colour.

The trunk and roots are Japanese Black pine but the branches and foliage is White pine. In time the bark on this tree will become increasingly more plated.
However the most outstanding feature to point out about these trees are that they are grafted onto Japanese black pine roots. Non grafted White pine can be challenging to grow outside of the climate which they would naturally be found in but when grafted on the much more vigorous Black pine roots we have a "super" pine which possesses the quality most revered in Black pine; the coarse bark and the soft, dense needles of the White pine. This also creates for us as bonsai artists many styling opportunities.
Tree Analysis
On close inspection of this tree which was field grown by one of my suppliers, one can see that the oldest needles are beginning to turn or have already turned yellow and are beginning to fall off. Part of the work which will now be done will include removing these spent needles.

Inner branches have died as a result of too little sunlight.
When the branches are separated you can see that many inner branches, which perhaps at one stage were simply weak, have now completely died back. This is as a result of lack of light penetration. These branches should be removed as part of the cleaning and preparation of this tree for wiring and subsequent styling.
Taking a step back; when presented with a bush like this and the material is carefully assessed for its merits, it's terribly exciting as the work which will now be done and the styling decisions taken largely determine the next 5, 10 or even the rest of this trees life. Therefore it is advisable to study at length, the tree from all angles and sides before launching in.
Styling
Change of angle

Using a few pieces of wood to alter the angle
The first step in styling this tree was to elevate the left side. This moved the trunk off from the vertical line created by the original planting angle. It is also the first step in creating movement.
Branch removal
Although there is a place for branches coming towards the viewer in this case a very heavy branch was directed straight forward and also obscured much of the trunk. This branch would need to be removed as a result.
There are two methods for removing a mature branch such as this.If you want the scar to heal over then cutting it flush with the surrounding tissue and then sealing with the appropriate putty type sealer would be the method of choice.

Utilizing stubs of branches as jin.
However another approach would be to utilize a portion of the branch as jin. To achieve this one cuts the branch shorter but allowing a substantial stub to remain. If you want a much longer jin then stripping all the needles from the branch will also result in the branch dying back. At this point however do not remove the bark flush to the trunk as this will result in an effort by the tree to heal and thus a lot of sap will be produced at this area and will essentially be energy lost. Rather leave the bark on the branch for up to 3 years before stripping the bark off. This ensures that resin will penetrate the branch helping to preserve it. You can split the branch with blunt tools such as a root cutter though to give it a little character for now.
Exercise caution
There is a sort of euphoria which comes over a bonsai artist when they begin pruning. With the removal of each branch there is this belief that the structure of the tree is improved. However although this may be so, there comes a point both for the health of the tree and for its design that this can go too far.

Removal of this branch at this time is fundamental to the styling of the tree and there was no alternative.
One of the fundamental differences between a conifer and a deciduous tree is that you cannot cut a conifer down to a bare trunk or even denude it of most of its foliage without killing it or at least severely weakening it. With experience as an artist and knowledge of the species you are working on, you will come to know how much can safely be removed at a time.

Branches which are directly above one another are less than ideal, however for now some of these can remain, to be removed later.
No material is perfect, and no doubt one will find problem branches on every piece of material which makes its way onto your worktable. One approach is to remove all these problem branches all at once and set the tree back, the other is to take a more cautious approach and over time eliminate these branches but for the moment use them and the strength they give to the tree to assist you in developing the tree.
Needle removal
It is necessary to remove not only the yellow, dying needles from the tree but also some of the 2 year old needles, with a focus on the needles at the bottom of branches and in congested areas such as at the forks of branches. Removing these needles further increases sunlight penetration into the tree and cleans the lines of the foliage pads.

When removing needles, don't pull them unless you can ensure that you will not tear the bark when you do so. Its safer to cut the needles.
However when removing these 2 year old needles do not remove all of them. These needles are claimed to possess certain hormones which are important to the health of the tree, and although they may not be as functional on a photosynthetic level as this years needles, they still perform an important role and should be preserved.
Back budding
As is the case with most trees that have been field grown or emerging from the development stage, branches will tend to be leggy. Sometimes it is necessary to graft inner growth but fortunately this type of white pine readily forms buds on older wood.

It would be great to encourage buds on leggy branches like these.
What is needed to generate these back buds is a healthy tree in good light. The more needles you have on a branch the more likely it is to produce a profusion of buds. By allowing these adventitious buds to form and develop aided by suffiicient sunlight, you will eventually be able to cut back to them and rebuild the branch thereby improving the structure (including branch taper and movement) as well as ramification.
Wiring
Although anodized aluminium wire is readily available and many will find it easier to work with, annealed copper is unbeaten in its ability to hold a branch in position. The artist is also able to use considerably thinner wire for a particular bend as opposed to the thickness of aluminium which would be required. Because of these qualities I chose to use copper wire for the wiring.
Whenever it is possible, it is always preferable to use a single wire versus multiple wires laid in parallel. One really should not use more than 2 strands of wire. (Take a look at some of the wiring tips and videos I have made available for your education)
As this is the first time this tree will be wired, and as our focus is on the positions of the primary branches we will apply "structural" wiring. What this means is that although I will apply wire to most branches of the tree the emphasis is on the structure of the tree which I need to get correct, and on this solid foundation then build the secondary and tertiary branching etc. Failure to complete or perform this step correctly will inevitably translate into a loss of time down the line when at least some of this work will need to be redone.
Order of wiring
One should always wire the most important branch of the tree, the one which defines direction first. Usually this is the first branch, but not always.

A completed branch pad, wired and with branchlets placed to allow each to get their own portion of sunlight.
Part of the reason for setting the structure of this branch first is to imprint the aesthetic approach which will be applied to the rest of the tree and its branches. In other words if you are going to wire the first branch in a slightly upward fashion, this will influence the position of all remaining branches. If you are going to create a pointed or rounded pad, this will influence how the remaining pads on the tree will be formed too.
Branch breaks and splits
In bending branches you are very likely to notice some tears and splits. Another of Miyajima Goyomatsu's characteristics is that once the branches are around 3 or 4 years old they become incredibly stiff and are extremely difficult to bend, if not impossible although young branches are very flexible indeed.

Branch breaks or tears should be sealed as soon as they are noticed.
When they have begun to stiffen they will break easily when bent beyond a certain point. One needs to be careful with these breaks, sealing them as soon as they occur to prevent loss of resin, but these breaks can actually be used to our advantage as once healed they will serve to keep the branches in their 'healed' positions.
The apex
For many, the design of and creation of an apex in a bonsai is a challenge. I have heard it being described as an information upright tree in miniature. I do not subscribe to this philosophy at all. The apex is the strongest, densest area of the tree (barring some exceptions such as the satsuki and other basally dominant species) and thus it should be the most ramified and least defined area. Different species demand a different approach to the apex stylistically.

The completed apex. In time the structure of the apex will be improved as buds develop into new branchlets which are better positioned than existing branches.
The apex also performs an incredibly important role in the design of the tree as it, together with the defining branch provide movement. (For example, an apex positioned vertically over the base of the tree will be a visually stationary tree. However move it to the left or to the right and the suggestion of movement follows in the same direction). In the case of this tree, and as the defining branch moves to the left, the apex also needs to be positioned to the left. It also follows then that to further emphasise this movement we will hold back foliage mass on the left and allow it to develop more on the right. Although there are exceptions and other approaches to design what I have described is what could be called conventional design.

Styling complete, for now.
Aftercare
Single flush pines, of which Japanese white pine is one, produce a single flush of needles on candles which develop in spring. As a result unlike double flush pines that should be fertilized strongly in spring, single flush pines should be fed well in autumn and again lightly after needles have hardened off in late spring or early summer. Fertilizing these pines while candles are extending will result in excessively large candles and needles so should be avoided. After styling this tree I applied a few sachet of BonsaiBoost.
As a fair amount of foliage has been removed the loss of moisture through the needles will be reduced. This means that the tree will require less water, so I need to be mindful of this when I am watering and be sure to reduce water given to this tree.
In summer, in South Africa, these trees cannot be exposed to full, all day sun as the needles will burn. However as it is now autumn and the sun considerably weaker it would be fine to expose it to more sun which will also serve to strengthen the inner buds which will now get more light with excess foliage having been removed.
At some point in winter I will treat this pine, along with all my other trees with a solution of lime sulphur and water. This is part of annual maintenance and helps to control fungal issues, and it is also claimed it helps to reduce or event prevents the overwintering of some pests.
Video
Leave a comment
Comments will be approved before showing up.
