Your Cart is Empty


Japanese black pine from seed, year 1
Introduction
Growing bonsai from seed requires dedication. In fact for most species of plants suited to bonsai I would recommend to grow from cuttings or layering. However for some species these techniques are not options and Japanese black pine is one such species.
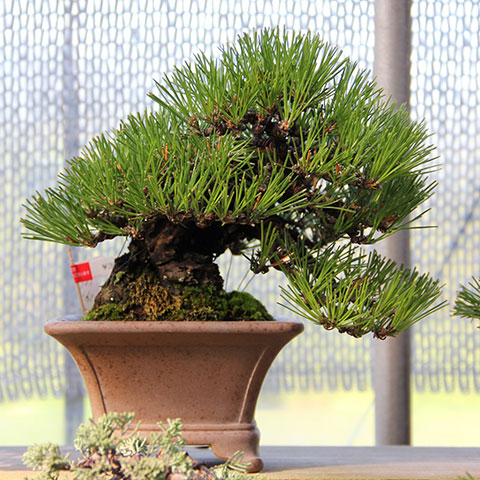
A wonderful semi cascade Japanese black pine styled by Japanese shohin artist and friend, Koji Hiramatsu.
Deciding to grow pines from seed requires long-term commitment. Depending on the desired size of tree and the growing techniques you choose, considerable time and resources in the form of water, fertilizer and containers may be required. It is likely to be a minimum of 8 years and easily 20 years before you have attained your goal of a high quality shohin or perhaps a fairly nice chuhin sized tree. Mame sized trees can be achieved in a considerably shorter space of time but I would suggest these are not intended as long term projects any way.
Getting started
I have been fortunate to be able to source fresh, viable seed from black pine growers in Japan. I do not offer seeds for sale, but from time to time I do sell seedlings and young plants. I am aware that you can purchase pine seeds locally too, or you can try to find someone with a mature tree from which you can get seeds when the tree has cones.
Storage of your seeds should not be in a sealed plastic bag, a brown paper bag is best. Be careful of insects or even rodents that might steal the seeds, so store them in a safe place. The environment should be exposed to ambient temperature so that the seeds can be feel the seasonal temperature changes. Do not store them in a garage which gets hot afternoon for instance.
As with most seeds the best time to sow them is at the beginning of Spring. Essentially when you see other trees beginning to wake up from winter dormancy and begin to grow, you can start to think about planting your pine seeds.
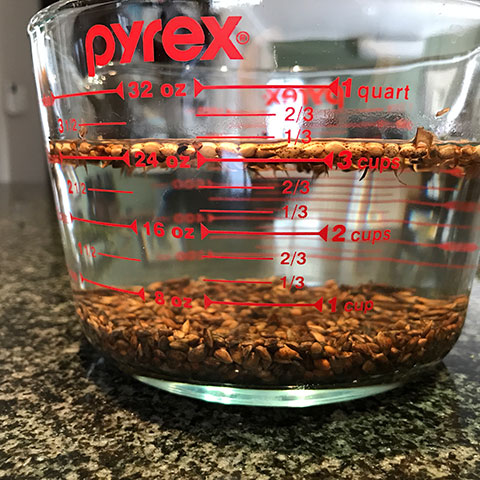
Seeds which sink are viable, those which float are most likely sterile and can be discarded.
I began the process in September by first soaking my seeds in boiled water which I allowed to cool off to a temperature of around 35 deg Celsius. After allowing the seeds to soak for around 24hrs I threw away the ones which floated (they’re sterile and will never germinate) and retrieved those which had sunk to the bottom.
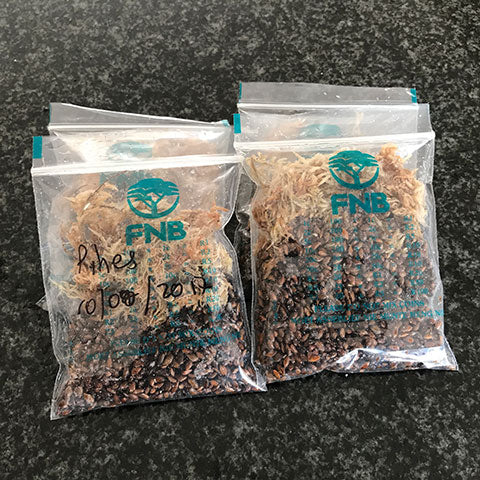
Stratifying your seeds for a week or so in the fridge will speed up germination when you plant them.
Pine seeds seem to germinate better if they have been stratified. This can be accomplished by placing the seeds into moist sphagnum moss in a bank bag, into the door of the fridge (where the cheese or eggs would normally go) just not the coldest spot in the fridge though. You can leave them here for roughly a week or a little longer if you wish. The idea of this last step is to provide a good cold spell so that when removed and exposed to spring temperatures the ambient temperatures should rapidly trigger the seeds into germination. The difference in the rate at which stratified and those seeds which are not germinate, is rather impressive.
Planting
Container
I have tried plastic seed trays and the styrene type of seedling trays where each seed is planted in an individual cavity. I prefer the plastic seedling tray. I find that making sure water reaches and is retained in the individual cavities of the styrene trays less forgiving, especially when you are using a mix which does not retain much water. The Italian made Deroma range of ceramic unglazed containers would also work perfectly if you are planting fewer seeds.
Growing medium
I place a fairly thick layer of small hyuga (Japanese pumice) particles at the bottom of the tray. In the middle I use coarse crushed silica with a little bit of Professional Seedling Mix (I cannot tell you the ratio as its by sight, but you don’t want a very wet mix as damping off of the young pine seedlings will then result). On top I finish with a thin layer of fine silica sand. This is by no means the only growing medium you can use, however it is what I have had good success with.
Placing the seeds
You could scatter the seeds on the surface and then cover with some more fine sand, but I prefer to apply a more deliberate approach to ensure each seedling has a little space around it. Using a ruler, I will gently push the pine seedling into the fine sand using a pair of tweezers. They should not be planted too deep or this will take longer to germinate or won’t germinate at all. About seed thickness depth is enough.
Water with a fine spray and when you do the little holes above the seeds will close up.
Placement
As with all seeds prior to germination, all they need is the right temperature and moisture. I place my seedling trays in a protected environment under shadecloth. In a couple weeks you should start seeing the seeds poking up through the soil. You can now gradually move them into more light but not full day sun just yet.
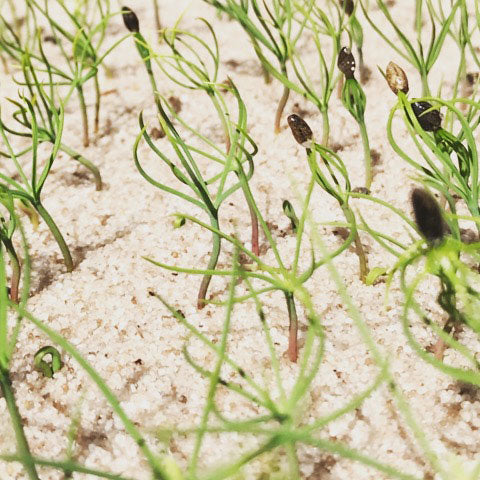
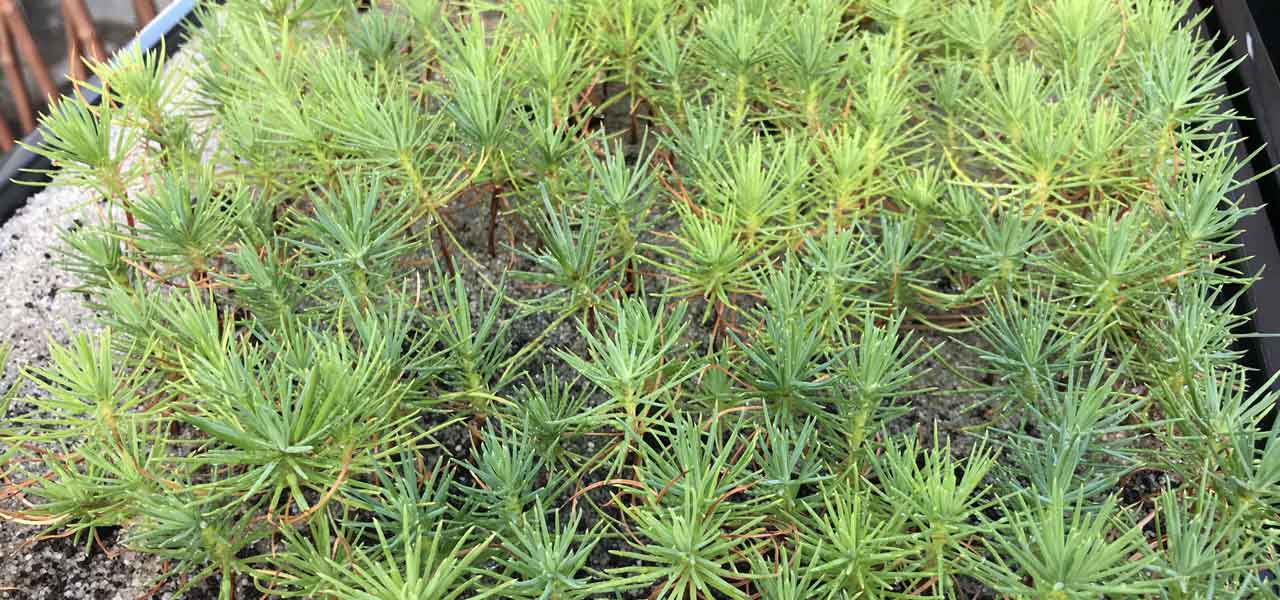
Healthy pine seedlings sprouting in the filtered sunlight.
At this time be careful not to over-water them as damping off will occur and you will lose all or many of your seedlings. Allowing the seedlings to dry out will certainly result in their very quick demise though too.
Cuttings or not?
In about 2 months the seedlings should be growing quite strongly, and the stem colour begins to change from green to a reddish tinge. At this time you need to make a decision whether you are going to make cuttings of the seedlings or not.
The benefit of seedling cuttings as far as I have seen is:
- All the roots emerge from the cutting at the same level making it easier to achieve better nebari on the future tree.
- The first nodes are much closer to the soil level, so you create more powerful smaller trees easier, using the sacrifice branches you can grow using the adventitious buds which develop.
The buds developing very low down on the seedling cutting will come in very handy when developing shohin with powerful trunks.
On the flip side, the growth of the seedling is greatly hindered initially compared to a seedling which was simply allowed to grow. In my opinion the initially slower growth is outweighed by the benefits in the longer term.
If you’re not going to make cuttings of them simply planting them over into a ceramic or plastic container is fine. Alternatively, you might wish to use the colander method which I will elaborate on further on in this article.
If you are going to take cuttings, then follow these steps.
- Should you only have a few seedlings, then prepare individual containers for growing the seedling cuttings on after this procedure. I usually plant many of them and so prefer to plant them into seedling trays again as less space is required. I pretty much reuse the same medium as I planted the seeds into originally.
- Prepare some Dip n Root rooting hormone according to the instructions (at the stronger concentration) in the box and set aside.
- Gently prick a seedling from the tray and using a very sharp blade or grafting knife cut the stem of the seedling so that only about 2cm of the stem remains. Every few cuts you make you may want to sterilize the blade to prevent any cross contamination.
- Put these seedling cuttings into water until you have a bunch of them.
- When you have enough, grab a clump of seedling cuttings and immerse the ends of the stems into the mixed rooting hormone and allow to soak for about 2 minutes. If doing a lot of cuttings, you will want to replace the hormone liquid every now and then.
Once you have completed the seedling cuttings, place in a sheltered position with lots of light such as morning sun, bright shade or under shade cloth.
After a few weeks new roots will emerge from the cut stems of the seedlings.
Growth in the 1st year
After another month you can transfer your clearly rooted seedling cuttings into individual containers, planting them into a free draining mix such as the Professional Mix with a little Akadama added. Or you might try something a little different as I will explain below.
Colanders
Much has already been written about the use of colanders to grow bonsai. Essentially a very free draining growing medium is used to promote oxygenation aided by the slots or holes in the container which produce prolific rooting. Combined with lots of water and fertilizer the plants growth above ground is enhanced. When roots reach the limit of the container, unlike conventional “closed” containers they do not coil, rather the tips stop elongating and initiate the development of more roots from the base of the plant.
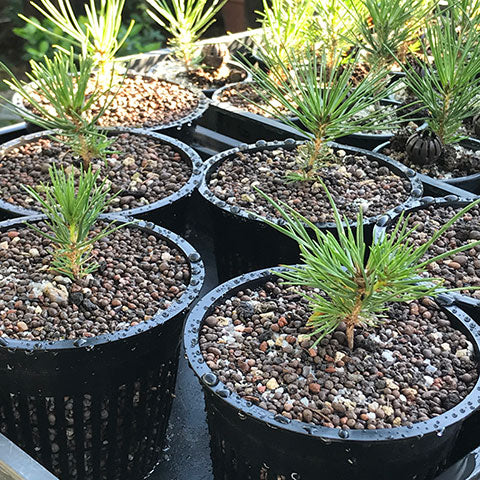
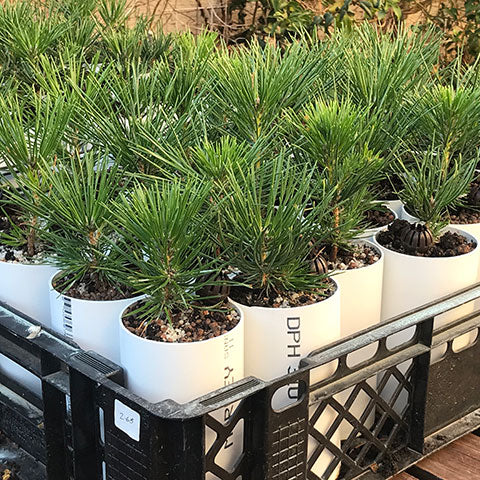
A few 1 year old pines in colanders.
This is an effective technique for growing pines, one which according to some authors can shave many years off the development time required for a pine. However, if you elect to use this method you need to be aware that you will need to use the correct growing medium as a fine, water retentive medium will not produce the desired results. Additionally, you will need to be careful with your watering as the medium will not retain much water and if you are unable to water the seedlings before they dry out entirely you will lose them. With all this watering any nutrients in the growing medium will be quickly leached out so you will need to fertilize a lot using mainly solid fertilizer.
Cascades and Exposed Root Styles
Cut standard downpipes to the required size, around 150mm or perhaps a little longer. Glue a piece of drainage mesh to the bottom of the cut tube. Fill the bottom ¼ with Professional mix. Add medium pumice till the tube is around ¾ full. Fill the remainder of the tube with more Professional mix planting a rooted seedling cutting into this top layer.
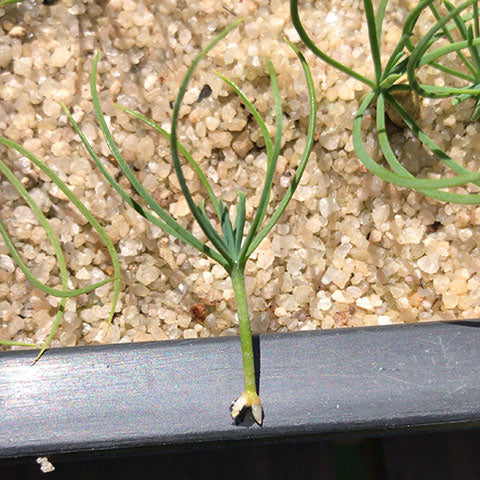
Seedling cuttings (1 1/2 years of age) which have been planted in custom made containers to encourage root development.
What happens now is that the roots will elongate down into the tube, weaving their way around the large pumice particles until they reach more growing medium at the bottom. After a few years you can remove the plant from the tube, exposing the roots. You can now use these plants for cascade or exposed root styled trees for a little fun and variety.
Teeny weeny fun
If you really want to have some fun plant some of the rooted seedling cuttings into mame sized containers. Use 100% fine akadama as you are going to need all the water retention and growing volume possible. Plant your seedling cutting into a container and top with some chopped sphagnum moss both for added water retention but also to prevent soil erosion.
Press these potted plants into a seedling tray (with drainage holes) filled with coarse grit. This will provide extra moisture and increase the surrounding humidity. The roots of the plants will grow into the stone, but you can simply lift the potted trees, trim the roots with some scissors and place them back into the tray every month or so.
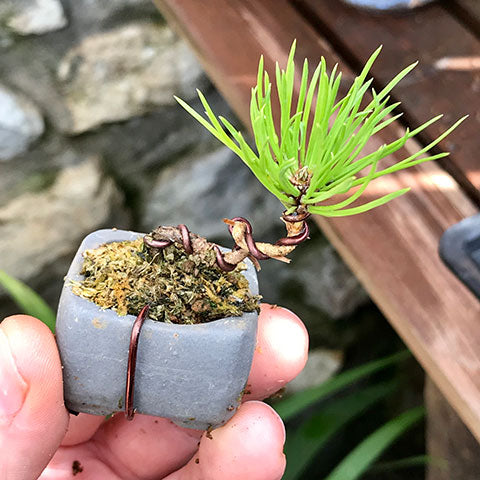
A cute little Japanese black pine created from a 1 year old seedling cutting.
Pines are remarkably flexible at this age. Use some aluminium wire and coil around the trunk. I have found that inserting the wire from the drainage hole, anchored to the side of the container itself helps to prevent too much movement of the tree in the tiny container. I then twist the tree and wire to really tighten the wire on the trunk which will speed up biting in of the wire, which will add character to the tree despite its young age. Then give is some dramatic bends and enjoy your "instant bonsai."
General care
Don’t water the seedlings excessively as they will suffer root rot and die. I feed weekly with Seagro or Sea Secret and Kelpak to promote root development and to provide the nutrients needed for strong growth. BonsaiBoost is constantly being added and replaced throughout the growing season.
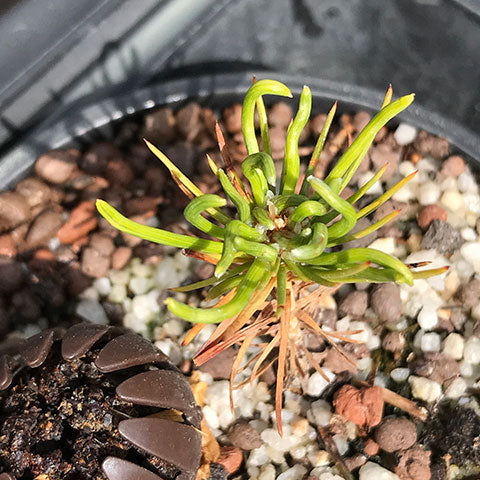
These disfigured needles are the result of fungal attack when they were developing.
You should also spray them monthly to prevent fungal problems and for this you can use something like Unizeb which contains the active ingredient, Mancozeb.
As you see the plants growing stronger you can move the plants into more sunlight until eventually, they are in full sun.
I don’t wire or prune at all in the first year, the goal now is to get them to grow as much as possible. Wiring them will only serve to slow them down as they heal into the wired position. There is also no need to prune as you want to get a little girth onto the tree so you can wire and do a little shaping in the second year.
Feed, water, sun. Repeat. Repeat. And repeat again.
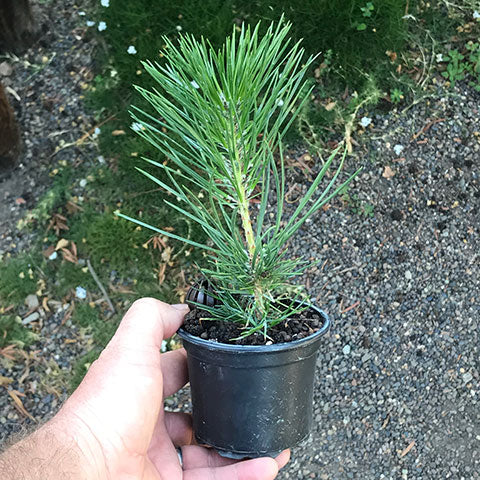
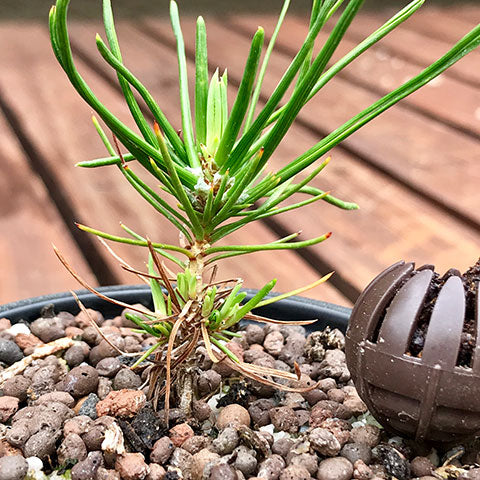
This seedling cutting in 9cm plastic container is about 1 1/2 years old. Notice the great budding lower down on the trunk which will be used to develop sacrifice branching to achieve a good sized trunk. The leader will be allowed to develop uncut as well to promote rampant sapflow and thus accelerate development.
Read more about Japanese black pines as bonsai here.
2 Responses

Leave a comment
Comments will be approved before showing up.

anton
March 28, 2023
Hi Terry
Can you perhaps explain what the purpose is of top layer of coarse silica sand?
Regards
Anton